Associated Wikis
(privileges may be required)
User Tools
Sidebar
chara:mircx_monitors
Displays for the MIRC-X wolverine2 monitors
Follow these instructions to get the wolverine2 monitors in the control room to display the MIRC-X desktop.
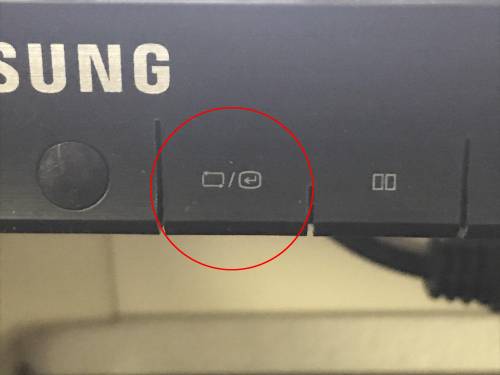
- On the front of each monitor press the screen change button (circled in the image below) to select the Display Port. When you click the screen change button, it will cycle through three options:
- Digital 1 - VEGA
- Digital 2 - No Input
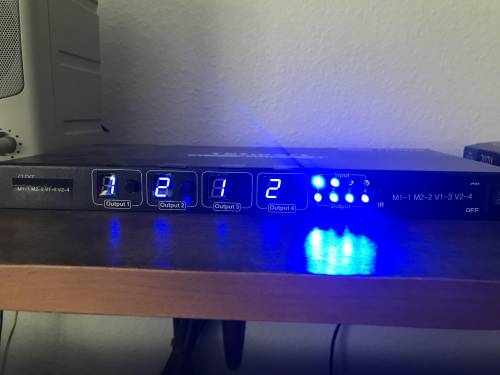
- Make sure that the switch on the shelf above the montiors is set to the MIRC-X outputs. All outputs should be 1 or 2 for MIRC-X as shown in the following image:

- If either of the screens are split, then press the split screen button to the right of the screen change button on the front of the monitors so that a single display shows on each monitor.
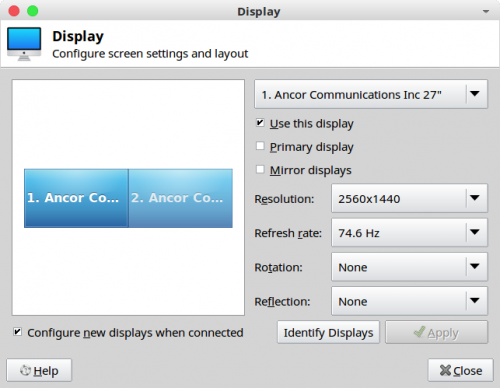
- If one of the monitors is on the Display Port but is not showing the wolverine2 desktop, then you need to reset the display settings. From the pull down menu on the operational monitor, select “Settings” and then select “Display.” Choose the option for two side-by-side displays. Make sure to click “Use this dispay” for each monitor. The screen resolution should be 2560×1440. Click the “Apply” button after making selections. When the screens are configured successfully, the dispay settings should look like the following:

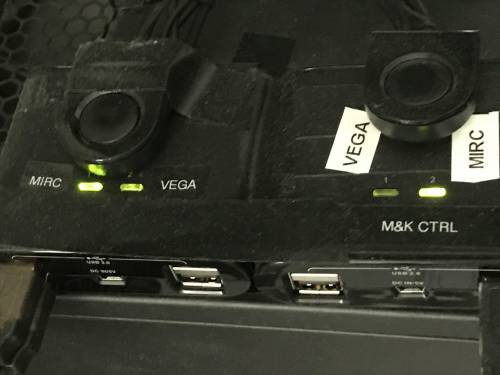
- To get the mouse and keyboard to interact with the MIRC-X wolverine2 computer, make sure the two switches on top of the wolverine2 computer case are set to MIRC:

- If wolverine2 doesn't show up on the Display Port after doing all of the above, try disconnecting and reconnecting the mini display port cable and USB cable on the back of the wolverine2 computer.
chara/mircx_monitors.txt · Last modified: 2020/08/11 20:05 by gail_stargazer
Except where otherwise noted, content on this wiki is licensed under the following license: CC Attribution-Share Alike 4.0 International


